This is a fun way to make a custom Rainbow Brite Night Light. Please note: this project requires tools and dealing with electronics, so please only an adult should attempt this project.
First take a “Projectable Night
Light”. I chose a blue one with silver base. This one normally
projects an underwater scene with fish.\
Next carefully take a tri-wing
screwdriver, (you can find these as part of a security screwdriver
set at most local hardware stores). Remove the three triangle shaped
screws.
Next carefully remove the front of the
silver plate. This will expose the inner workings of the night light.
We don't want to mess with any of these.
Next carefully dismount the projector
ball. It is held on with a spring on each side. This allows it to
rotate yet still brings power to the LED light inside.
Carefully take apart the projector ball
and remove the projector inside. The small round film that is the
slide image will come out. This is the image we will be replacing.
What can we replace the image with?
You can use two things that I know of.
1: a view master reel. The view master
film frame is nearly as small as the projector film. You will need a
hole puncher or Xacto knife to cut the correct shape.
2: a Rainbow Brite projector film cell.
These were from the Rainbow Brite and the Star Stealer trailer from
the 1980's. The film cells are very big in comparison to the tiny
cell you need for the projector, so select a scene that is a wide
shot, or a specific character you want projected. You will also need
a hole puncher or Xacto to cut the film in the correct shape.
Next, slide the new cell in the place
of the old one and put the projector back together.
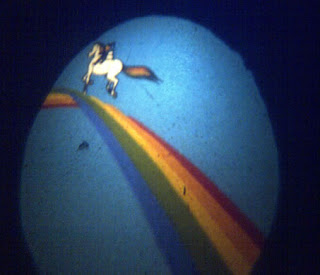
Once back together, you should get
something that looks like this:
the method I chose was a Film Cell. It
is of Rainbow Brite, Starlite, and Twink riding a rainbow. It's a
nice “window” in to Rainbow Land that I can project onto my wall,
ceiling or anywhere I choose.
Please note the clarity of the image depends on the quality of the image, the distance from the light to the surface you are projecting on and if your cell is laying completely flat inside the projector.
You can currently find a set of cells on Ebay here.
If you try this project, what method
did you do? And what image did you get?
Let us know!
Have a Rainbow Day!
Have a Rainbow Day!


No comments:
Post a Comment